Blog #2 - Solar Powered Remote Controlled Lawn Mower
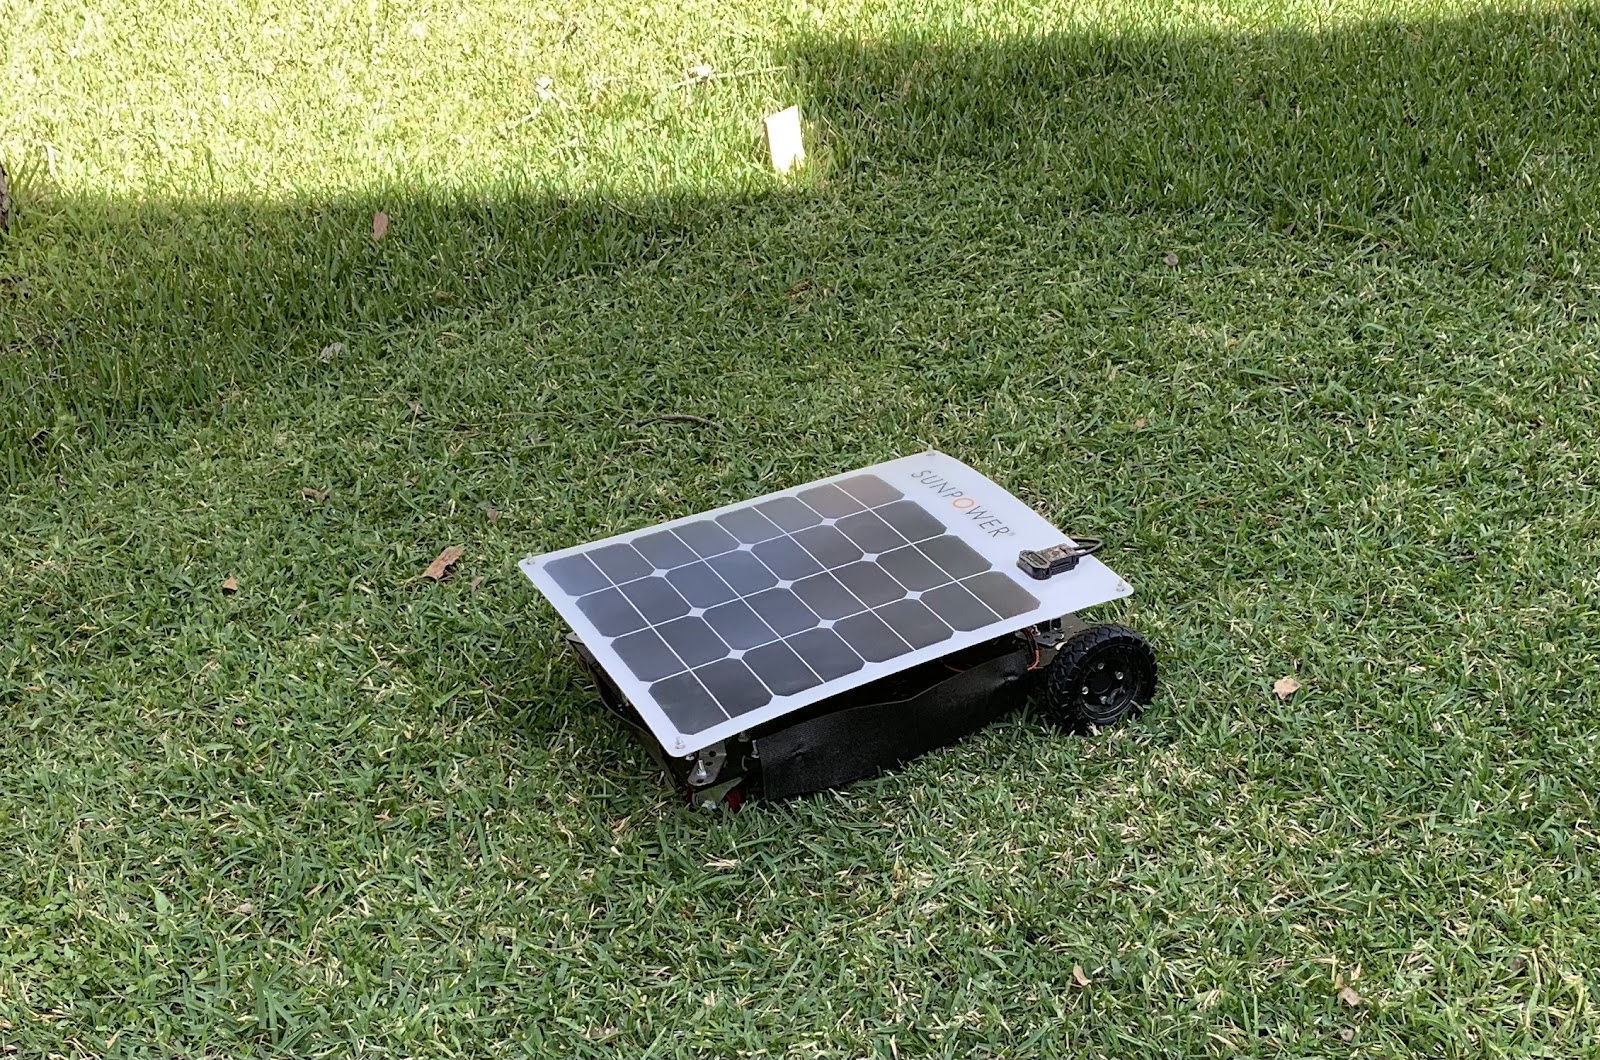
Over the period of Feb 5 to Feb 19 of 2022, group 19 has focused on finalizing our initial prototype of our lawn mower design. We got the last component needed for our charging system (solar panel wiring kit), and have confirmed the compatibility of all of our components. The chassis has been drilled for two drive motors and for the 2 free-spinning caster wheels, which have been mounted using bolts. After running some tests, we have realized the placement of the battery is crucial for our design. The battery is the heaviest component of our design, and is the biggest factor for getting sufficient traction in the drive wheels without lifting the front wheels off the ground under acceleration. The battery is currently temporarily fixed using partially screwed screws in the ABS chassis, to allow for future adjustment as we see fit. The drive system is assembled, with the two ESC’s and remote control receiver wired to control the power from the battery to the drive motors. As mentioned, we have performed multiple rounds of testing for the drive system. The video below (Figure 1) shows our chassis and drive system functioning in a grass yard.
Figure 1: Testing of drive, radio control, and chassis systems on grass
For that test, we did not yet have the solar system or cutting system fixed to the chassis. The solar system has been wired up, and works to charge our battery. The solar panel charging system outputs about 13.8 Volts at 1.9 Amps, which will sufficiently charge our 12 volt battery in approximately 9-10 hours of those figures according to rough calculations. Figure 2 below shows all of our electronic components wired after some testing, with temporary connections and mounting.

Figure 2: Electronics overview after component testing
The largest challenge our team has run into the past couple weeks is in regards to the cutting system. Initially our team planned on using a singular cutting motor and plastic blade system from an existing weed-whacker, but once we actually got the parts in hand and mocked up it has become obvious this will not be sufficient. The motor itself has plenty of power, but the plastic blades are too short which would result in a lot of dead zone for our lawn mower. To address this problem, our team is considering a couple of different routes. One thing we could do is swap to a new system, with a more powerful motor to turn a steel blade with much wider cutting width. This seems to be a major safety concern, as in that scenario we would be increasing our rotating mass significantly with a sharp metal blade mounted on an ABS chassis. The other route we are considering is adding a second (or even 3rd) motor and blade setup identical to the one we already have. This would double (or triple) our cutting width, and would be much safer than the metal blade option. In order to prevent a small sliver of dead space in between the motors, we would stagger them to have a small amount of overlap while still not interfering with each other. Figure 3 below shows a very rough idea of how this staggered dual blade setup would look in terms of arrangement and cutting width.
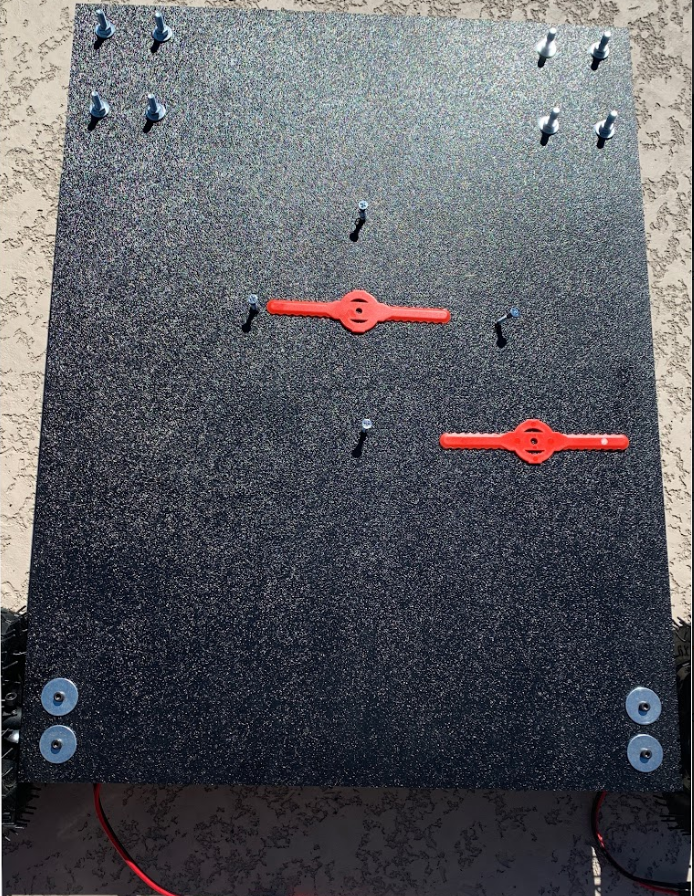
Figure 3: Potential layout for dual bladed cutting system
One blade provides a cutting width of about 5.5 inches, so adding a second cutting system would increase the cutting footprint to about 10.5 inches (accounting for about a .5 inch overlap to prevent a dead space between blades). In terms of wiring and electronics, this addition of a second motor would be straightforward and would not impact our operational run time substantially.
For the next week or so (Feb 20-26), Team 19 has multiple tasks to tend to. The first item on the list is to mount the single cutting motor to our chassis, so that we will then have a functioning prototype. For prototyping purposes, we will just have a removable connection for the power. In the future after testing we want to have a way to remotely switch power on and off for the cutting motor(s), but this will be a finalization item. Once we mount the single motor, we will perform some initial grass cutting tests and make a decision on which previously discussed option we will pursue to increase our cutting width, and order the necessary parts as soon as possible. We are currently leaning towards ordering a second identical system to supplement what we already have. The last major thing we strive to accomplish in this upcoming work period is 3D print simple mounts for the solar panel, so we can finally mount the solar charging system on board. Once we have mounted the cutting motor and solar panel, then we will work on tidying up our wiring harness and securely mounting the battery, electronic speed controllers, solar charge controller, and radio control receiver instead of the temporary setup we have used thus far for initial component compatibility testing.


Comments
Post a Comment